Building a Steel String Guitar

a step by step show and tell

Architecture, graphic design, your projects.

Moderators: kiore, Blip, The_Metatron

Re: Building a Steel String Guitar

#41  Postby John Platko » Oct 10, 2015 3:57 pm

hackenslash wrote:
John Platko wrote:
This study?


That's the one.


I thought it worth while to dig into this a bit more because this is pretty typical luthier woo. The study makes that clear from the get go by using plenty of wiggle words. which I'll highlight.

Abstract

Classical violins created by Cremonese masters, such as Antonio Stradivari and Giuseppe Guarneri Del Gesu, have become the benchmark to which the sound of all violins are compared in terms of their abilities of expressiveness and projection. By general consensus, no luthier since that time has been able to replicate the sound quality of these classical instruments. The vibration and sound radiation characteristics of a violin are determined by an instrument's geometry and the material properties of the wood. New test methods allow the non-destructive examination of one of the key material properties, the wood density, at the growth ring level of detail. The densities of five classical and eight modern violins were compared, using computed tomography and specially developed image-processing software. No significant differences were found between the median densities of the modern and the antique violins, however the density difference between wood grains of early and late growth was significantly smaller in the classical Cremonese violins compared with modern violins, in both the top (Spruce) and back (Maple) plates (p = 0.028 and 0.008, respectively). The mean density differential (SE) of the top plates of the modern and classical violins was 274 (26.6) and 183 (11.7) gram/liter. For the back plates, the values were 128 (2.6) and 115 (2.0) gram/liter. These differences in density differentials may reflect similar changes in stiffness distributions, which could directly impact vibrational efficacy or indirectly modify sound radiation via altered damping characteristics. Either of these mechanisms may help explain the acoustical differences between the classical and modern violins.


... measure this, measure that and conclude ?

Conclusions

The density differentials found in this study may contribute to the generally recognized superior sound production of classical Cremonese violins. Within the violin making tradition there have been many reported ‘secrets’ of the Cremonese makers although usually with little or no supporting documentation. Sporadically, reference is made to the wood treatment referred to as ‘ponding’, whereby wood submerged in stream water (to facilitate transportation or to alter the properties of the wood intentionally) is responsible for the classical Cremonese sound. It has been documented [23] that ponding does alter wood properties significantly, by causing decomposition of various wood elements depending on the particular bacteria or fungus introduced into the wood. Although data on density alteration are not currently available, it is reasonable to assume that this degradation would result in lowered densities; how this impacts density differential would be dependant on the specific treatment. It has been shown that the wood of the classical Cremonese instruments was likely not ponded [24]. However, this does not rule out bacterial or fungal attack as a means of altering new wood to more closely match the material properties of the Cremonese wood. As mentioned earlier, one back and one top plate of the new instruments may have been treated and if this were indeed the case, the treatment used by the supplier would have been ponding. Another technique, referred to as “stewing” wood has been mentioned whereby wood is boiled in different solutions to achieve alterations of density although there is no published data on what this process is actually doing to the wood. Bucur has shown that time plays a role in altering wood properties by decomposition and loss of hemicellulose, thereby resulting in lower density [9] and a priori an alteration of differential, which may also explain our results. Fuming with nitric acid or ammonia are treatments that have been used throughout the years by instrument makers and it is a reasonable assumption that the destructive properties of these agents would lower the density and change the differential depending on which grains, early or late, are most affected. Many other possibilities have been proposed over time, but these are the only ones directly related to density that we are aware of.

In summary, our results clearly document basic material property differences between the woods used by the classical Cremonese and contemporary makers. Although at this point we can do no more than speculate as to the cause, these findings may facilitate replicating the tonal qualities of these ancient instruments.


The authors summed it up nicely.
I like to imagine ...
User avatar
John Platko
THREAD STARTER
 
Name: John Platko
Posts: 9411
Male

Country: US
United States (us)
Print view this post

Re: Building a Steel String Guitar

#42  Postby John Platko » Oct 11, 2015 1:38 pm

Making rosette rings

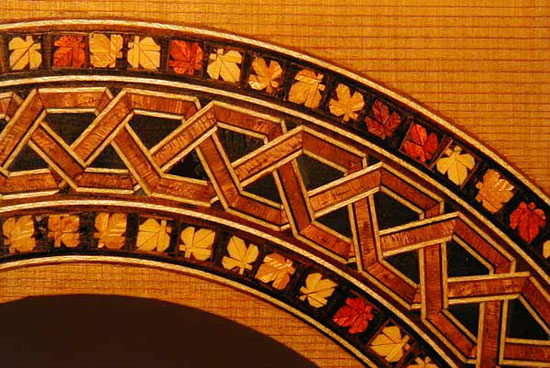
It's traditional and functional to inlay a rosette around the sound hole. The rosette helps keep the wood near the sound hold edge from cracking. Simple rings will protect the sound hole area but often the rosette is also used as a decorative opportunity. Elaborate marquetry is often used on classical guitars. Steel sting acoustics have traditionally had more modest rosettes but abalone and herringbone marquetry can be spectacular too.

I'll be using a fairly wide single ring rosette consisting of mother-of-pearl with a boarder or rosewood-maple-rosewood rings.

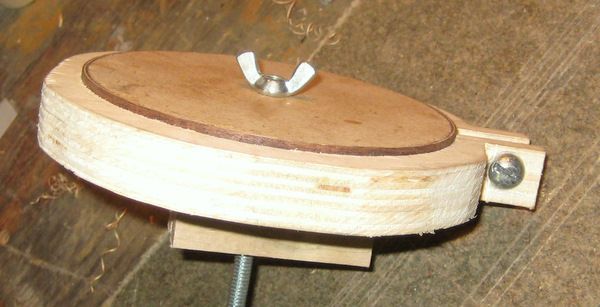
I find it easier to make the rosewood-maple-rosewood rings first and then inlay them into the guitar. I make a ring log that will supply rings for several guitars.

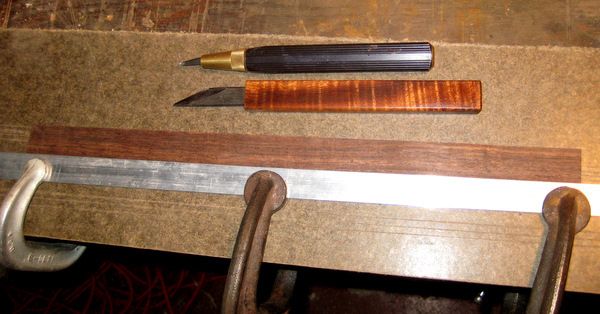
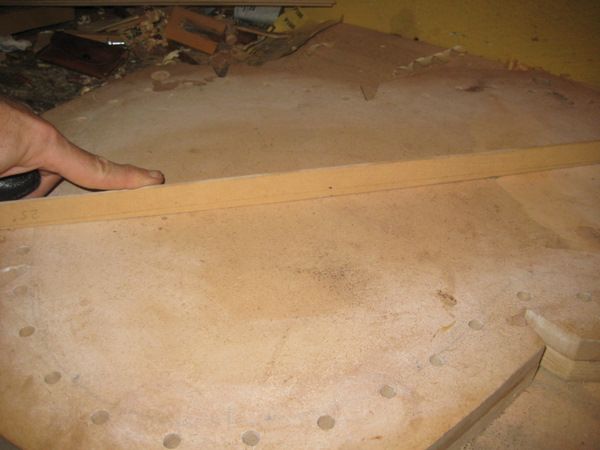
I clamp rosewood veneer under a straightedge.

Image

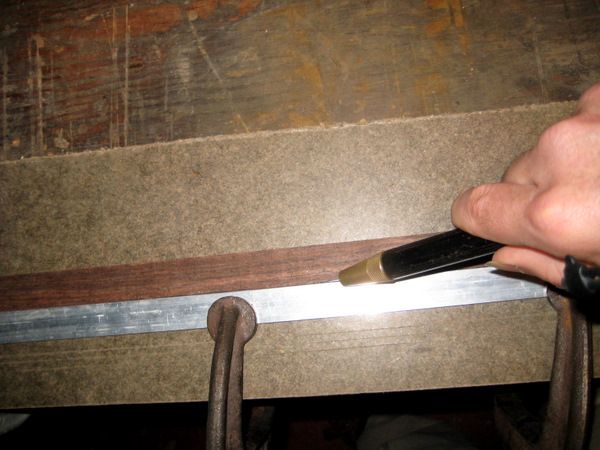
Making the cut with many light passes over the wood with a razor knife.

Image

The lines don't need to be very thick to be distinctive. .010” - .020” is wide enough.

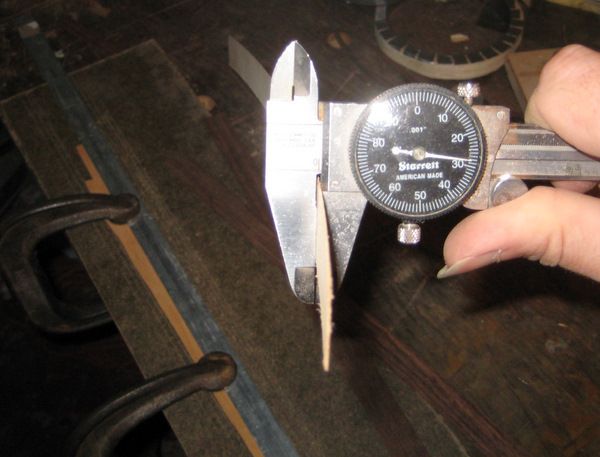
My maple veneer is bit too thick for what I want.

Image

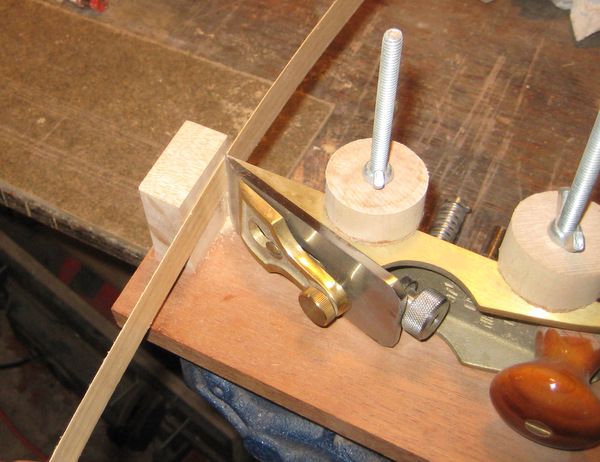
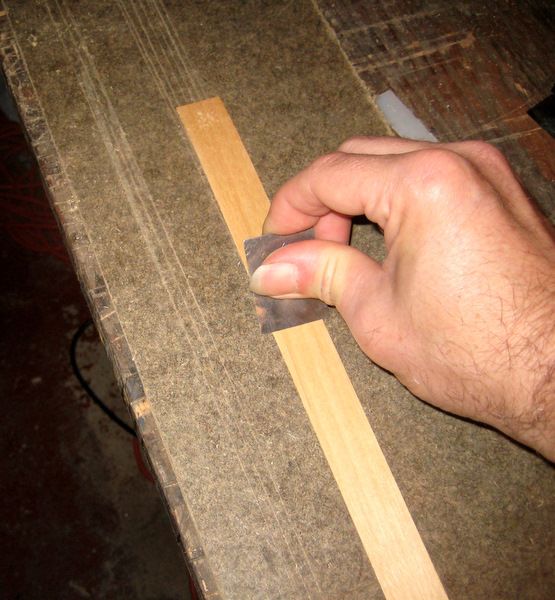
I use a blade mounted as a scraper to thin down veneer. Many light passes, reversing the veneer each pass gets the job done.

Image

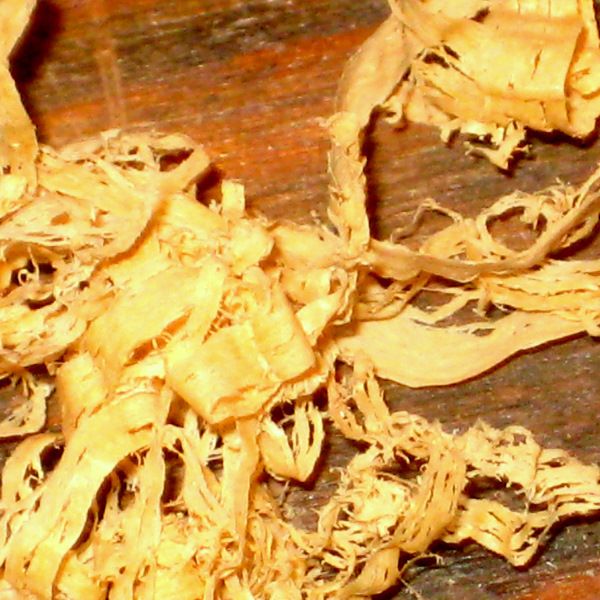
You can see how fine the shavings are.

Image

A quick pass with a scraper to level out the hump in the middle of the veneer.

Image

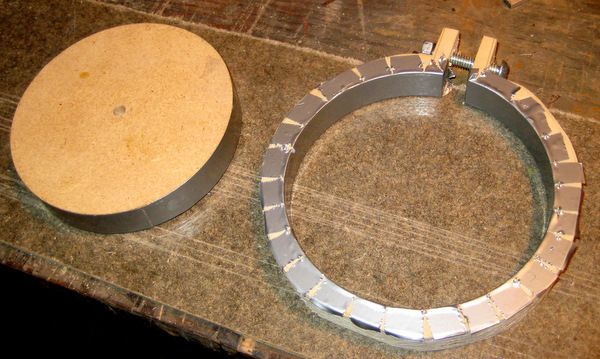
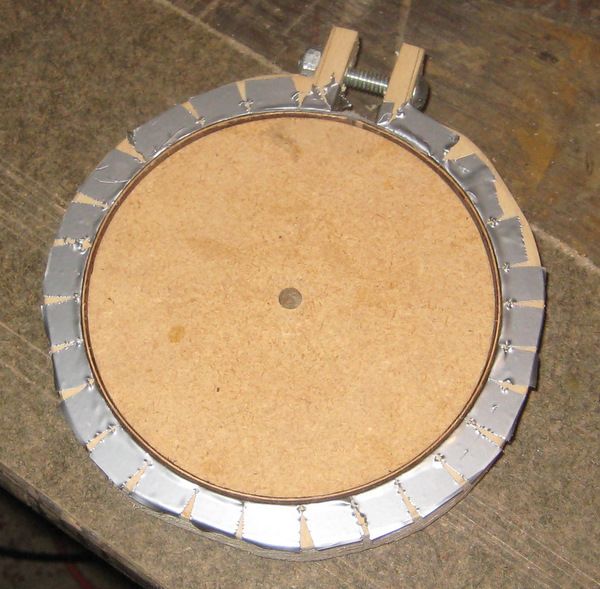
I use a simple mold to form the veneer log.

Image

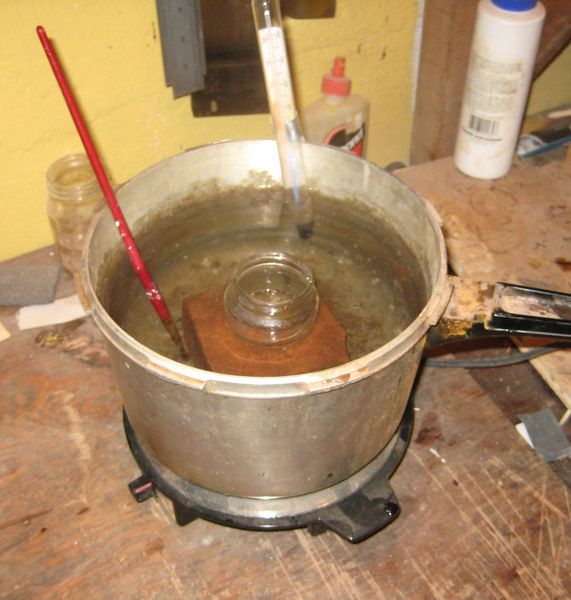
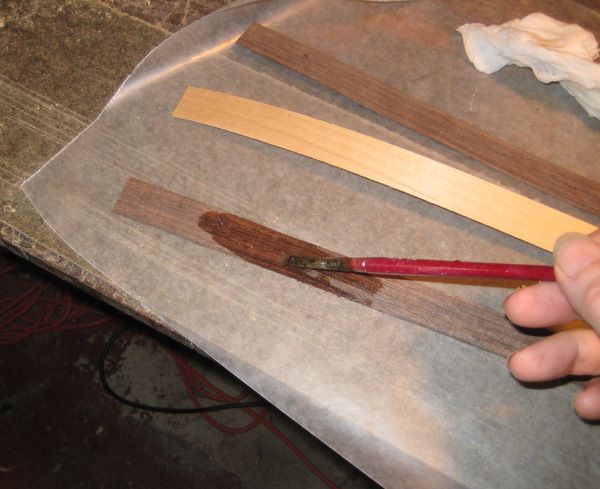
I like to use hide glue for the rings. The glue is heated in a double boiler to 145 degrees F.

Image

Here's a video that explains how to use hot hide glue.


Brush glue on each surface that contacts another.

Image

Load the veneer sandwich in the mold. And let it dry over night.

Image

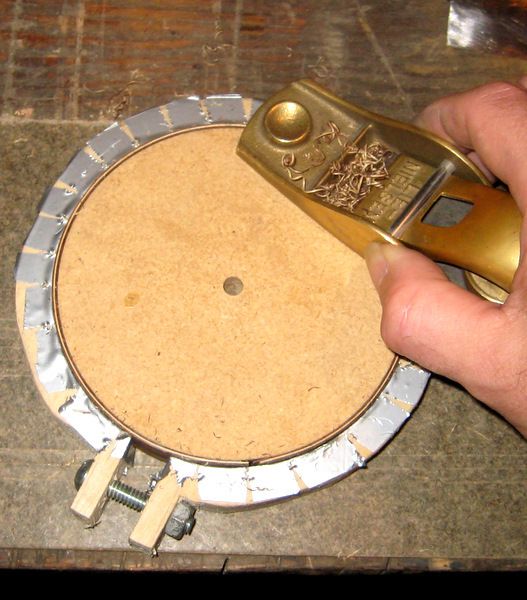
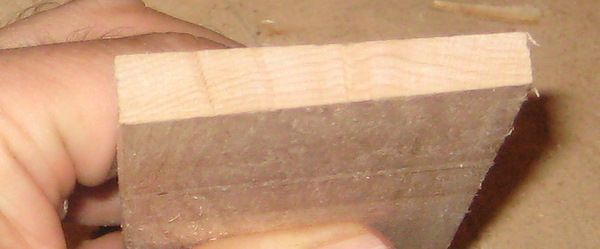
Level a surface of the log with block plane.

Image

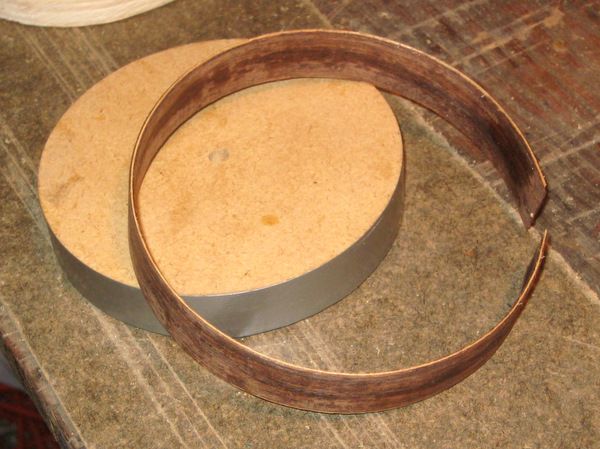
The log out of the mold.

Image

All that's left to do is to slice off some rings for this guitar. Expose a bit (about .080” ) of the log from the mold.

Image

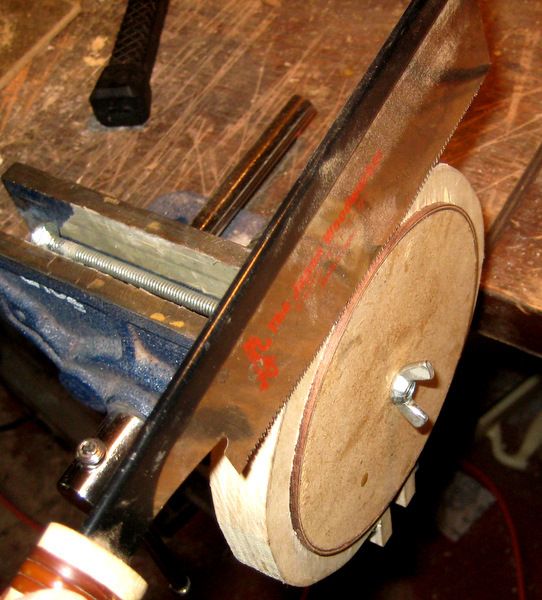
Cut with a fine blade saw.

Image

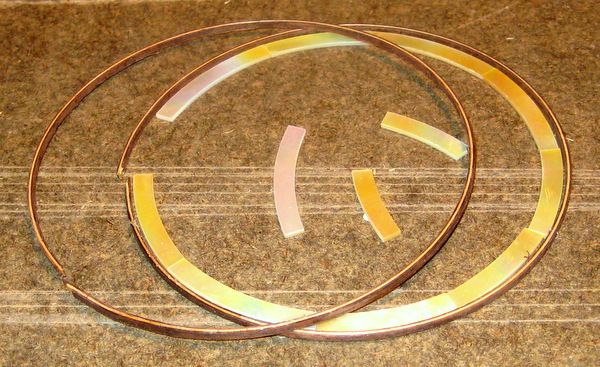
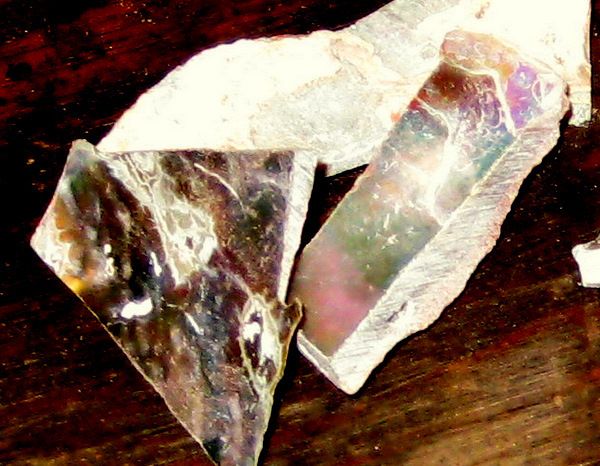
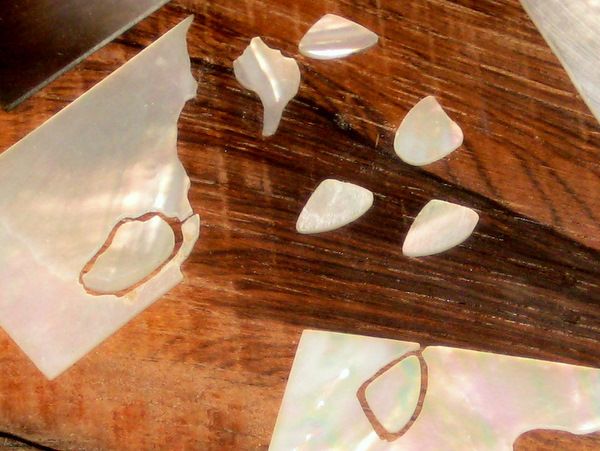
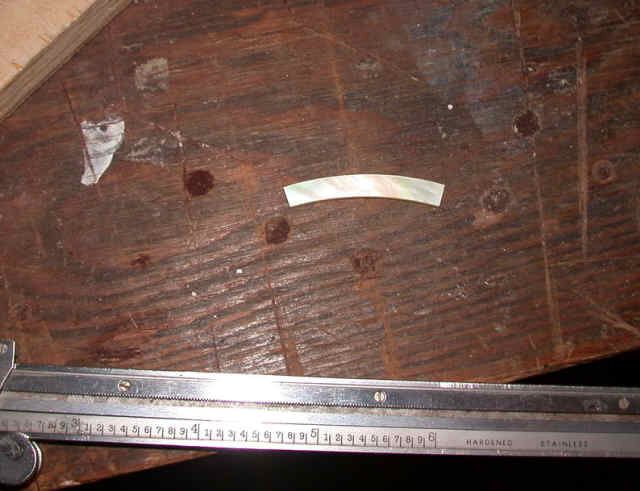
The finished rings, along with the mother of pearl shell that I'll be using with the rings to make the rosette.

Image
I like to imagine ...
User avatar
John Platko
THREAD STARTER
 
Name: John Platko
Posts: 9411
Male

Country: US
United States (us)
Print view this post

Re: Building a Steel String Guitar

#43  Postby Alan B » Oct 11, 2015 3:13 pm

I'm enjoying this thread.

Fascinating.
I have NO BELIEF in the existence of a God or gods. I do not have to offer evidence nor do I have to determine absence of evidence because I do not ASSERT that a God does or does not or gods do or do not exist.
User avatar
Alan B
 
Posts: 9999
Age: 87
Male

Country: UK (Birmingham)
United Kingdom (uk)
Print view this post

Re: Building a Steel String Guitar

#44  Postby Shrunk » Oct 11, 2015 4:14 pm

John Platko wrote:No, it's just that sanded joints don't create as good a glue joint as a freshly planed joint. See page 3 for more details.


And you don't get those beautiful curly shavings from sanding.

EDIT: Ah, I see they make an appearance later in the thread.
"A community is infinitely more brutalised by the habitual employment of punishment than it is by the occasional occurrence of crime." -Oscar Wilde
User avatar
Shrunk
 
Posts: 26170
Age: 59
Male

Country: Canada
Canada (ca)
Print view this post

Re: Building a Steel String Guitar

#45  Postby John Platko » Oct 12, 2015 1:48 pm

Cutting a shell for a rosette

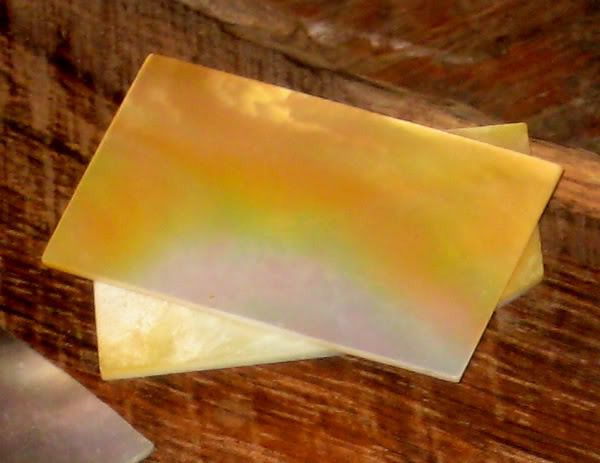
Abalone is often used for a decorative element on a rosette. Mother-of-pearl is another option. Of course you can buy pre-cut pieces of shell for a rosette in various widths but I cut my own shell. Shell is available in small blanks and is sold by the ounce. Blanks with a thickness of .05 or .06 are appropriate for rosettes and provide enough material for leveling. In addition to solid shell, laminated shell material is also available. There are many advantages to using laminated shell and the result is very attractive but I prefer the overall look of solid shell. You can also start with a raw shell and grind the blanks yourself but I generally don't recommend that.

Some raw shell ready to be ground into blanks.

Image

Mother-of pearl blanks.

Image

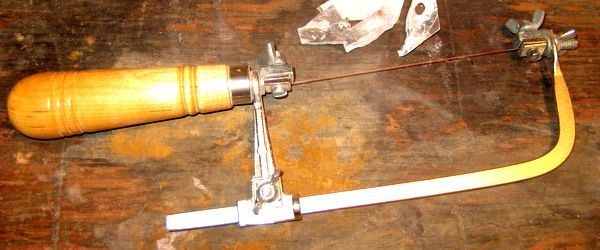
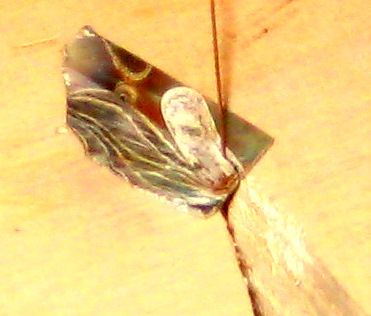
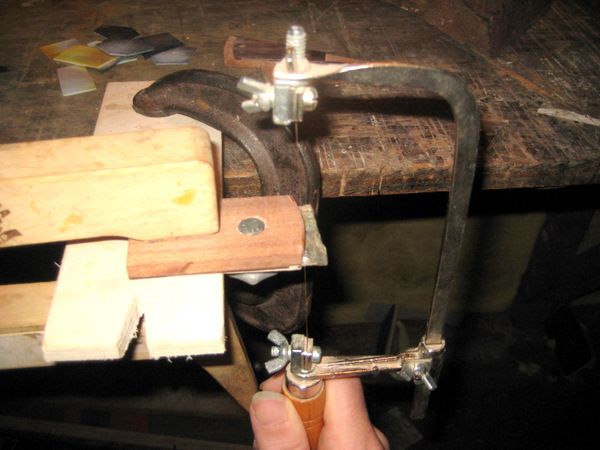
A jewelers saw is used to cut shell blanks into the desired shape.

Image

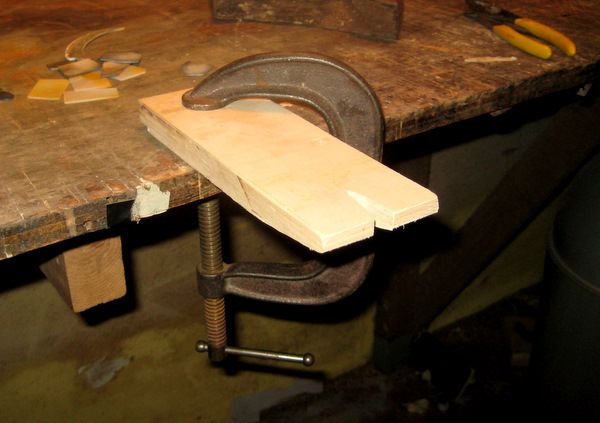
A simple board with a v notch cut into it is the traditional table used for holding the shell blank.

Image

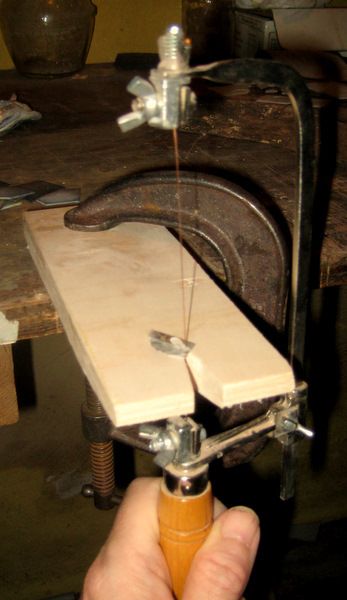
Cutting shell by hand.

Image

Image

Image

Image

Image

While a complete rosette can be made by carefully cutting the shell by hand and then filing the shell to a perfect shape, I prefer to use some power tools to help speed the process and provide more accuracy.

I start by grinding the inside diameter.

Image

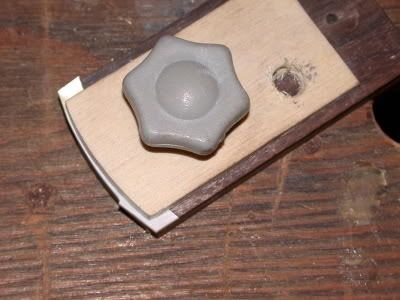
Here’s the jig I use for holding the shell.

Image

Image

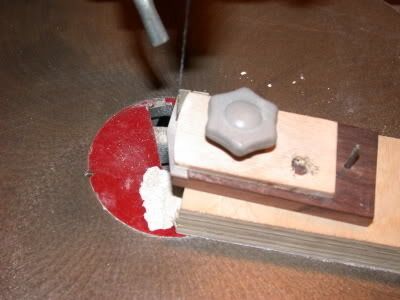
This is the only shell cutting operation that I find a scroll saw really good for.

Here’s the basic setup

Image

Here’s the shell locked and loaded ready to go. I cut a bit wide and clean-up on the sander.

Image

Halfway through the cut.

Image

Done. With a larger shell it cuts pretty clean all the way through.

This one needs more than the usual amount of cleanup.

Image

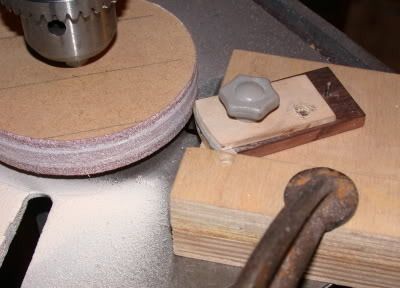
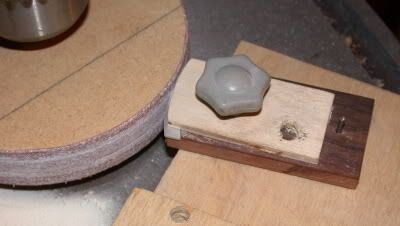
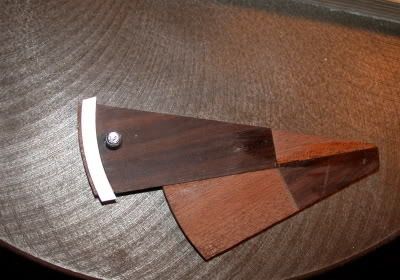
Here’s the setup for cleanup on the outside diameter. The shell holder pivots to define the
outer circumferences of a circle.

Image

Halfway through.

Image

Done

Image

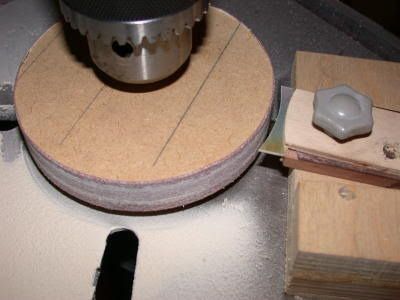
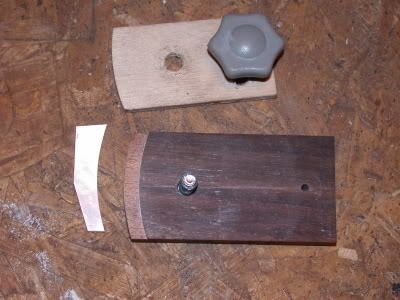
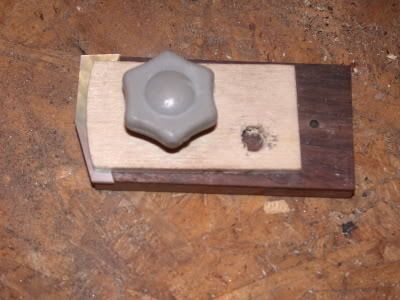
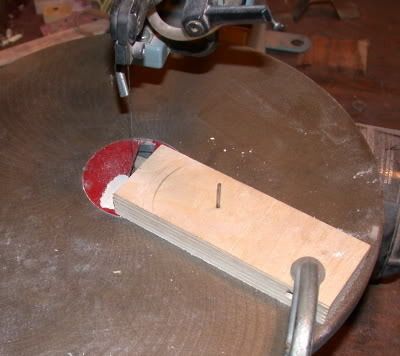
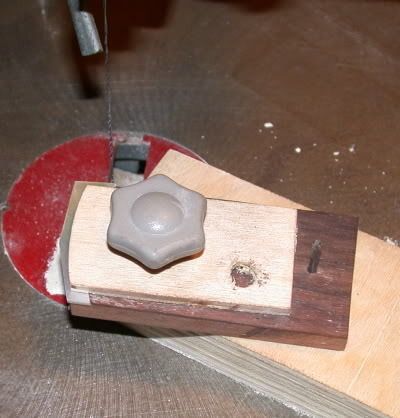
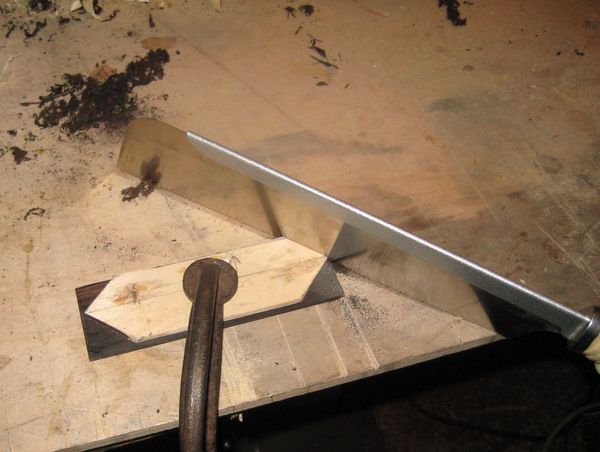
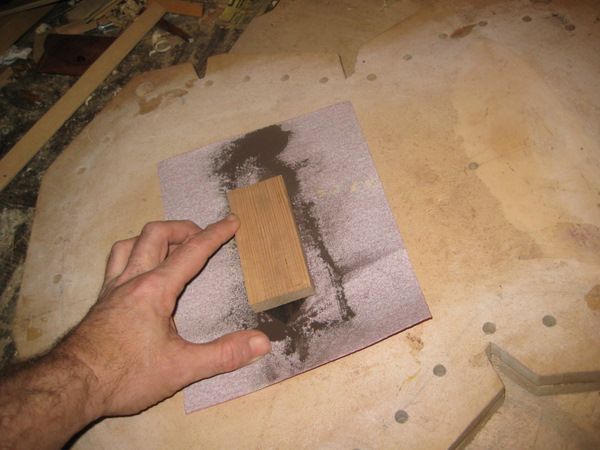
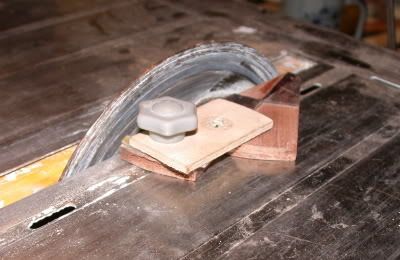
I used to go through a lot of saws mitering the ends. Now I use this jig and some sandpaper on an old wet saw (I use it dry for this). It makes short work of this job

Image

Image

Image

Repeat as needed ...

Image
I like to imagine ...
User avatar
John Platko
THREAD STARTER
 
Name: John Platko
Posts: 9411
Male

Country: US
United States (us)
Print view this post

Re: Building a Steel String Guitar

#46  Postby John Platko » Oct 13, 2015 1:26 pm

Inlaying the rosette and cutting the sound hole

The next step is to inlay the rosette and then cut out the sound hole. It's important to determine the size and location of the sound hole first.

The sound hole allows air to move in and out of the guitar as the plates move, this allows the plates to move more freely. The sound hole also plays a big role in determining the lowest resonance of the guitar. It does so in a way similar to the way a coke bottle makes a sound when you blow across the top of it. It's not quite the same as this though because a coke bottle is a lot more rigid than a bottle.
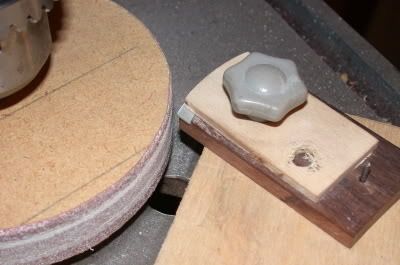
Because the top and bottom of the guitar are not rigid it makes it very difficult, to calculate this resonance frequency, although that doesn't stop people from trying. In the final analysis the sound hole size and position has been determined by evolution for a given guitar shape/size.

There are some rules of thumb about the sound hole that are good to know.

A smaller hole will lower the frequency of the low resonance. A larger hole will raise the frequency and increase the projection. It's not too uncommon for people to enlarge the sound hole in a Martin dread to get the sound they like.

If you move the sound hole up closer to the neck you lower the resonance frequency.
Unless you have a really good reason to do otherwise, the sound hole size and location should be copied from a guitar you like.
With that in mind, measure, re-measure, and measure again where the center of the sound hole should be located on your sound board. I like to double check by locating the end of the fingerboard on the soundboard too. I mark the center with an awl and drill a hole which is my pivot point for the sound hole radius and the rosette.

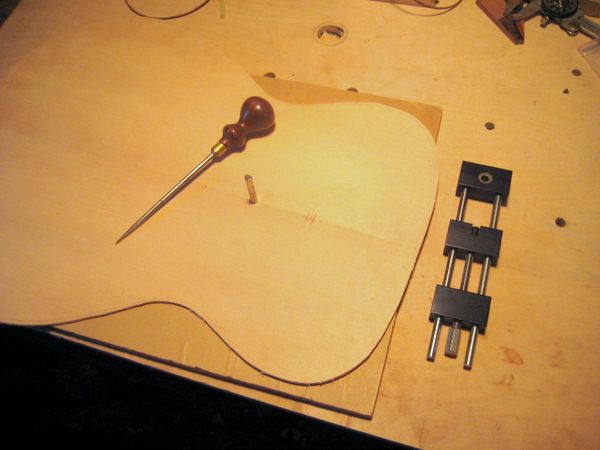
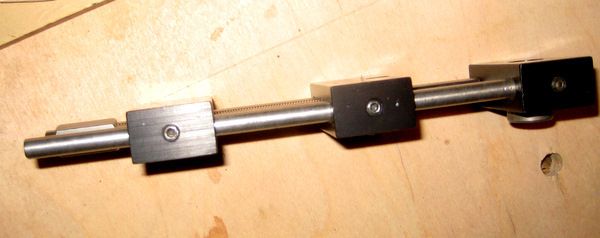
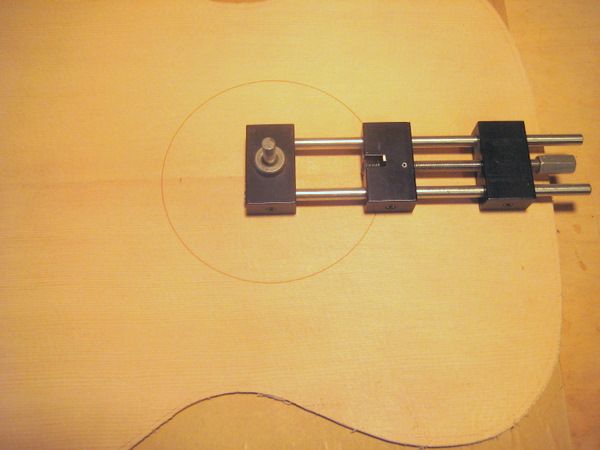
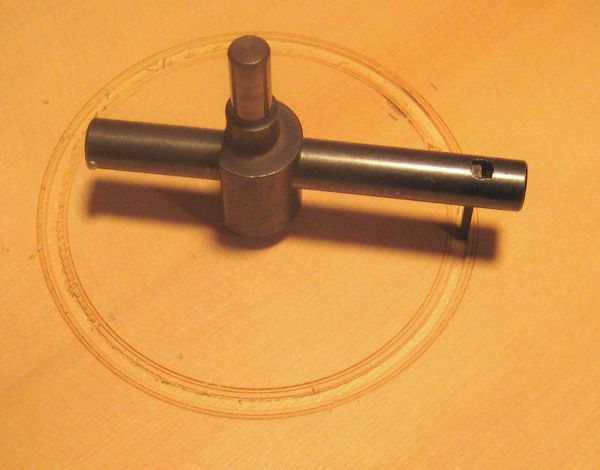
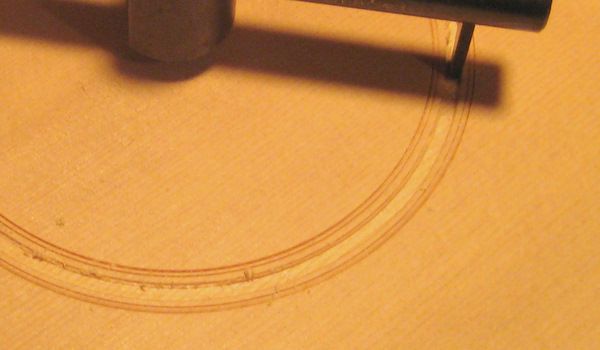
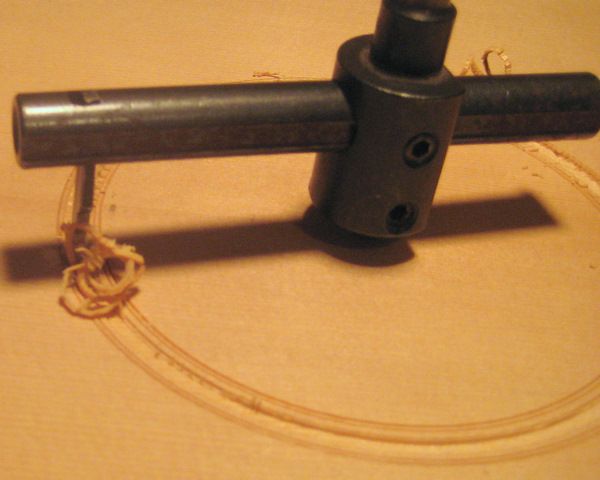
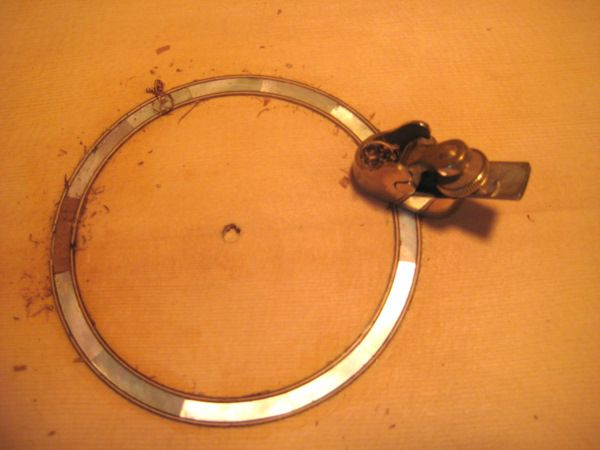
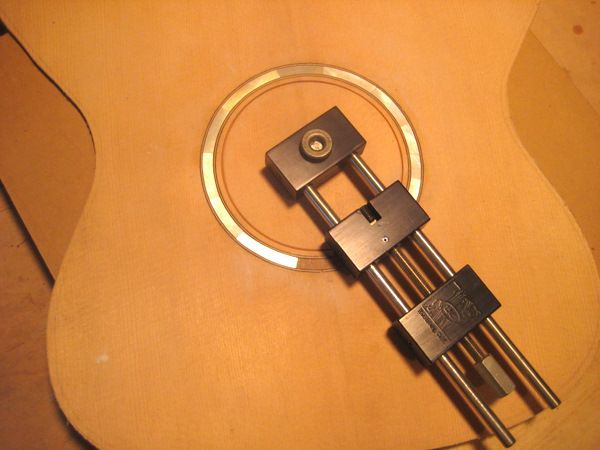
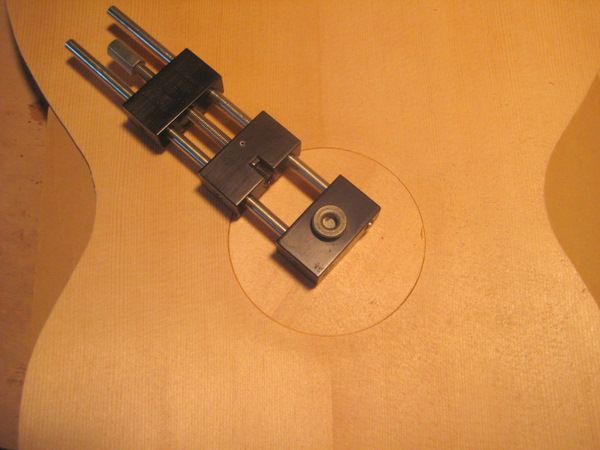
I use a fancy tool to mark the rosette channels and cut the sound hole. It works well but you could make a similar tool using an exacto knife blade to cut the channel. All you need is an adjustable way to hold the blade a distance from a pivot point. A sharp wheel cutter in a drill press can also work but I'm going to do this by hand.

The center of the sound hole drilled with a 1/4” pivot rod inserted in the soundboard and a support thicker support board which the soundboard is on.

Image

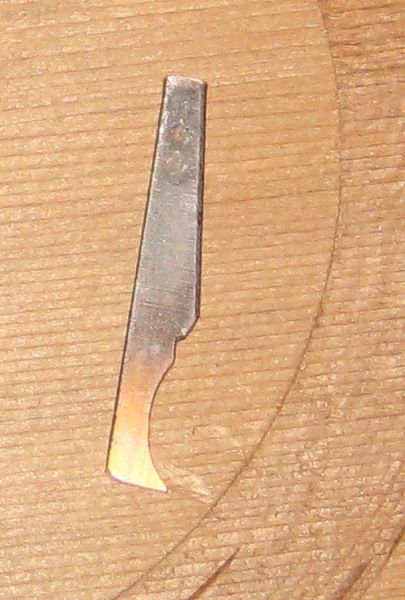
A close up of the tool which will score the outside perimeter of the rosette channel. The flat part of the blade should face the outer wall of the channel. I flip the blade around when changing from an inner to outer perimeter.

Image

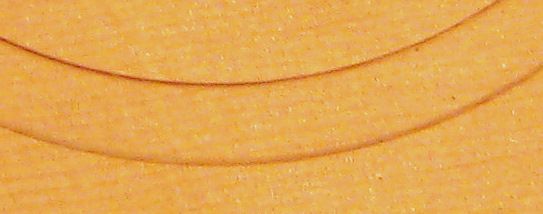
Lightly score the perimeter making several passes instead of one deep pass. Extra care is needed where the cut is parallel to the grain. The blade should be razor sharp, in fact, a razor blade (scalpel) is a good choice. The cut should be the thickness of your shell (.05” -.06”)

Image

Here's a video I found which shows how to do this.


You may want to do a practice cut at the same time so that you can check the width of the channel before you commit to the size on the actual soundboard. The fit should be snug but not tight- the glue will make it tight.

Image

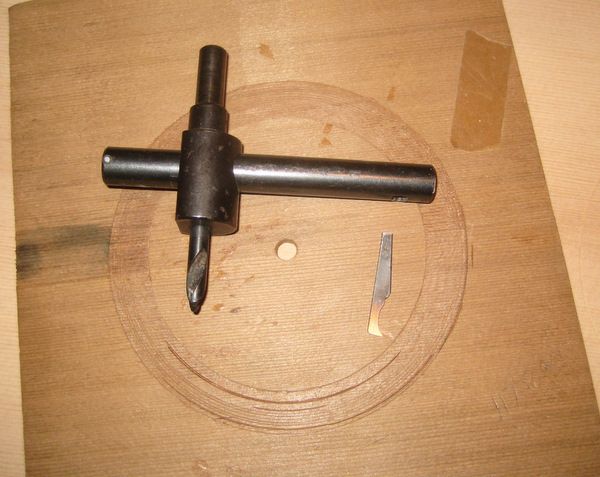
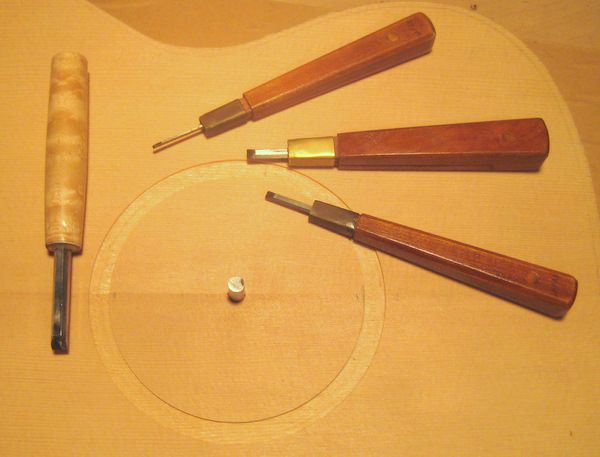
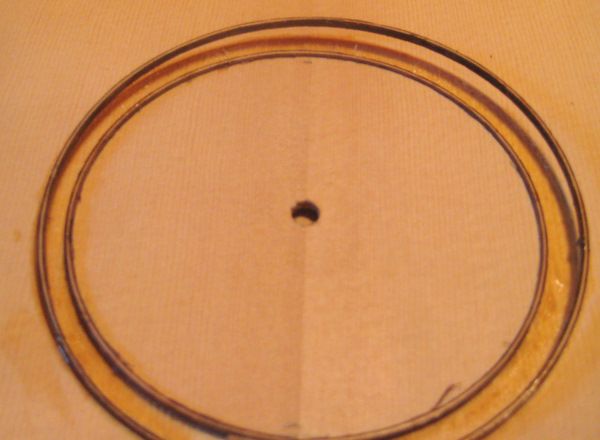
I like to use hand tools to remove the wood from the channel. A small very sharp chisel and steady hands is all you need for this. I prefer using a chisel I made held by a circle cutter and turned by hand. They're shown on top of my practice board.

Image

Image

I take a little bit off each pass (we're back on the real soundboard)

Image

Image

Image

And remove any remaining bits with some small chisels.

Image
I like to imagine ...
User avatar
John Platko
THREAD STARTER
 
Name: John Platko
Posts: 9411
Male

Country: US
United States (us)
Print view this post

Re: Building a Steel String Guitar

#47  Postby John Platko » Oct 14, 2015 1:19 pm

Gulling in the rosette

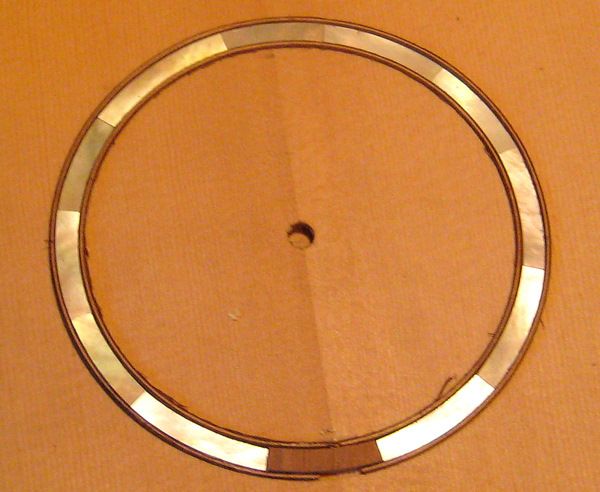
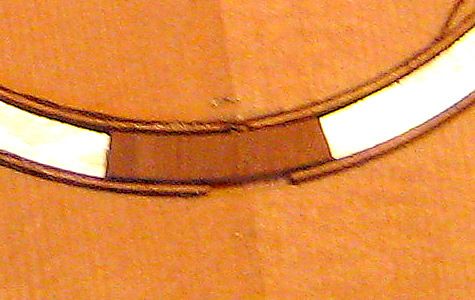
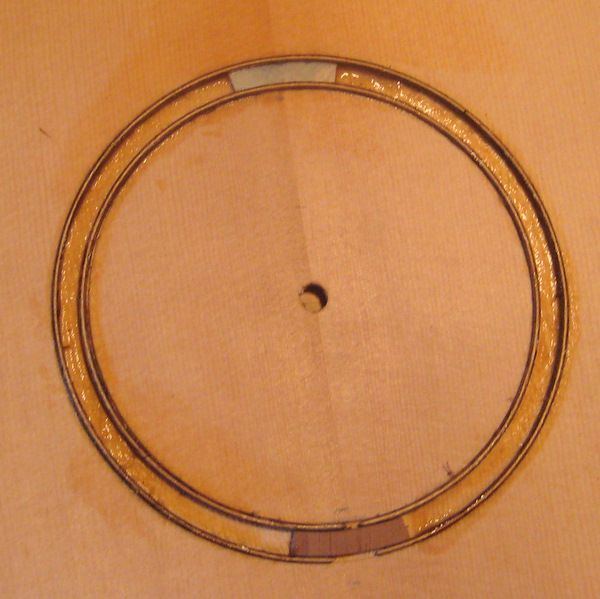
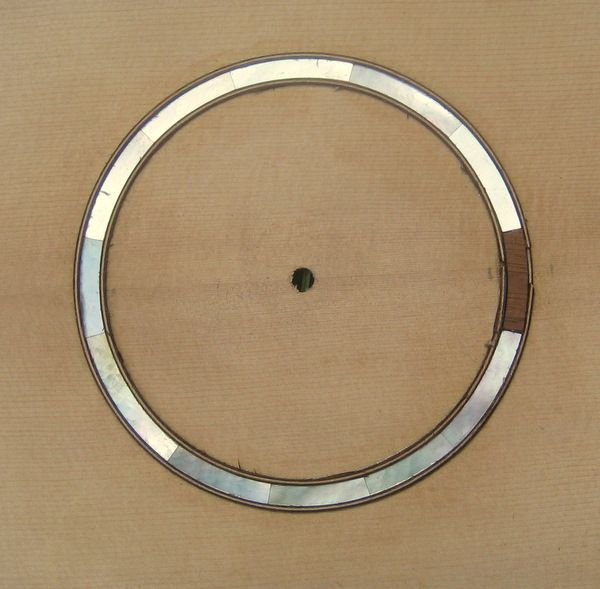
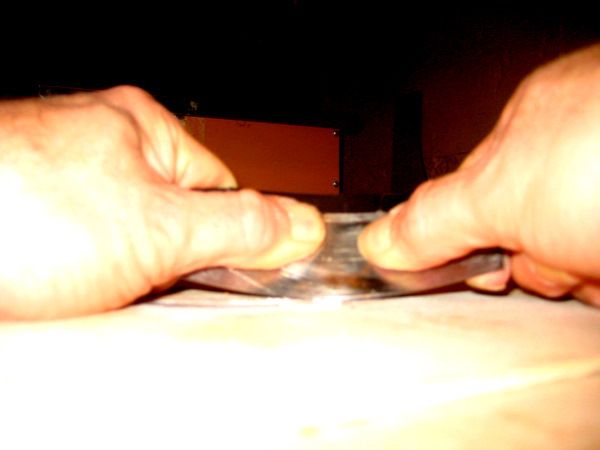
Before gluing in the rosette I do a dry fit to make sure everything is OK. At this point I usually have to adjust a few of the shell miters so that they line up. Also, in a few places the shell pieces were a bit thin on the ends so I cut that part off.

Also, remember to put the part of the ring that was planed down, the part that was cut with the saw that is a bit rough should be up- it will be planed later

Image

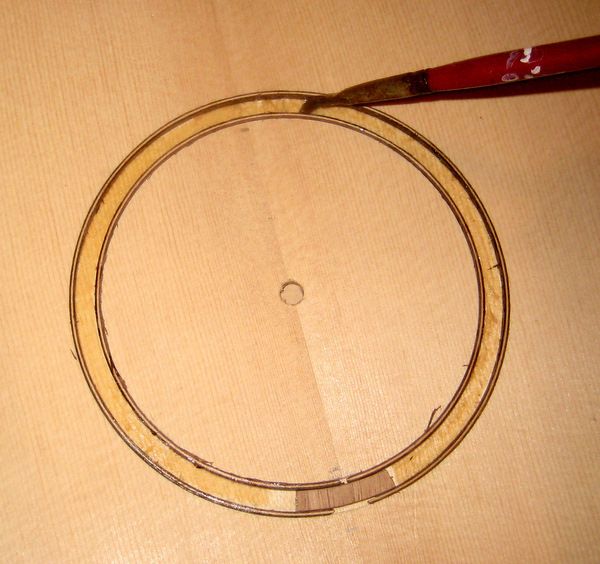
Part of the rosettes is under the fingerboard so I don't go all the way around with shell. I use a piece of filler wood. Also, there's no need for a tight fit where the end of the rings meet, A bit of a gap there makes it easier to get a good fit around the ring.

Image

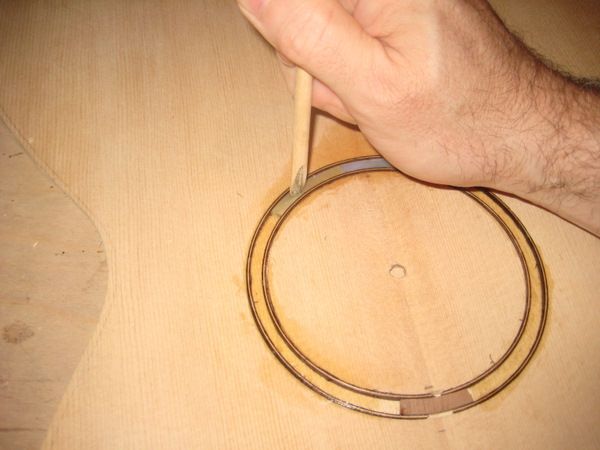
Now it's time to glue in the rosette. I use hot-hide glue for for the rosette. I like it because I can take my time without worrying about glue drying too fast. That's because I can reactivate the glue with a dab of fresh hot glue as I go. Also, it doesn't leave any unsightly glue stains.

Other choices for glue are:

Epoxy- This is probably the best choice for holding everything in place but I don't like it because it's messy, it can seep into end grain and leave a stain. I would shellac the rosette channel to prevent the epoxy from seeping into the wood if I were using it.

Super glue- pretty easy to use until you get your fingers stuck to the soundboard. It can also get into end grain and stain the soundboard so I would shellac the rosette channel first if I were using it. It can also cause the rosewood strips of the veneer rings to bleed and make a mess.

White glue would be my second choice after hot-hide glue. It's a pretty good choice for this operation.
Of course, if I were using plastic in the rosette then a plastic glue would be more appropriate.

I like to pin the rings in place by keeping the wood end piece in place as I glue.

I start by coating the channel with some glue, it doesn't matter if it dries, it will reactivate when I add more.

Image

Next I lift the rings and add glue to the rim of the channel.

Image

I like to start inserting shell at the soundboard seam.

Image

I use a little stick to press the shell in place.

Image

I add glue as I go and in no time, it's all done.

Image

I keep applying pressure and make sure everything is down until the glue begins to tack and set. I didn't use a caul this time but it's not a bad idea to make one out of a not stick material and use a few camps to hold the shell down, just make sure that the rings are also down.

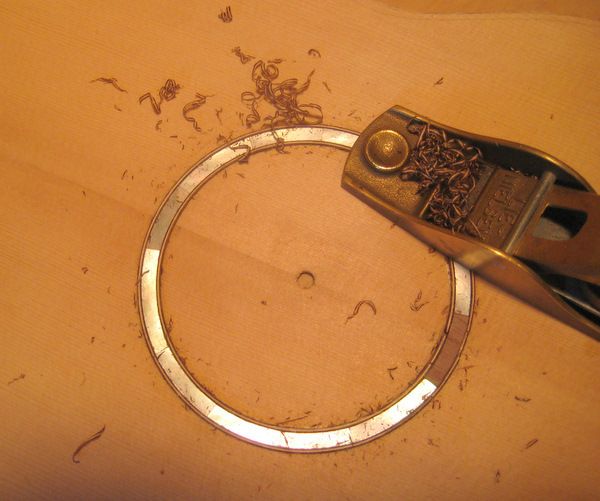
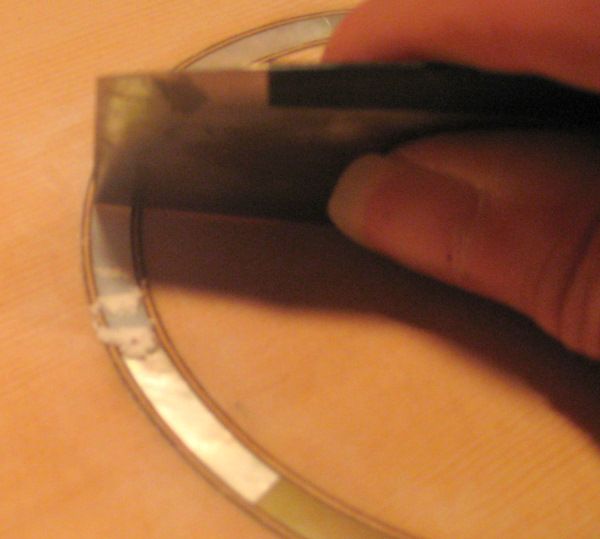
Now that the rosette in glued in place and the glue has dried overnight it's time to level the rosette. The tricky part about this operation is that we have a soft soundboard and very hard shell so if you use a sanding block to level it's easy to round over the top of the shell and thin the soundboard down. So, I only use sandpaper if I'm having a problem area with the scraper and then very carefully and until I take out whatever is causing the scraper to hang up.

I start by taking the rings down to the height of the shell with a block plane.

Image

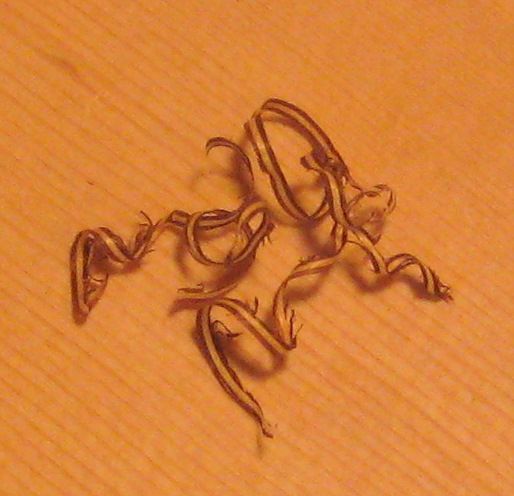
You get these nice little shavings.

Image

As I get closer to the shell I switch to a little violin plane because I'm less likely to gauge the soundboard.

Image

Then I switch over to a scraper. While the shell is pretty high I use the scraper in a normal way.
Image

When I get very close to the soundboard I just use the edge of the scraper and go slow.
Image

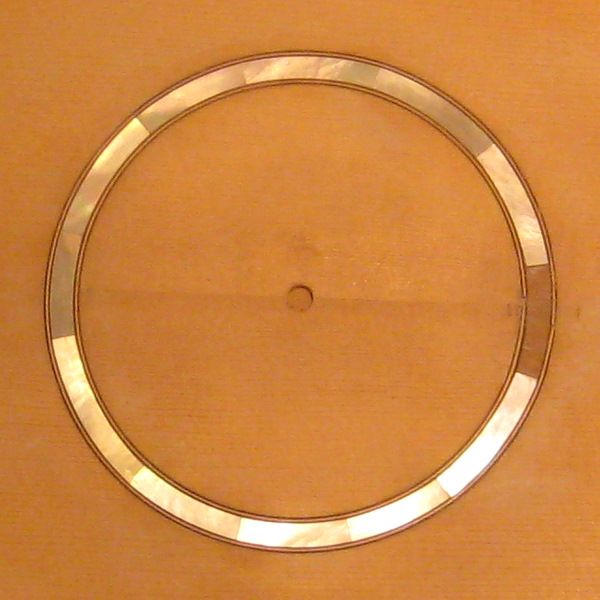
After a bit, it's done.

Image

Image

Image
I like to imagine ...
User avatar
John Platko
THREAD STARTER
 
Name: John Platko
Posts: 9411
Male

Country: US
United States (us)
Print view this post

Re: Building a Steel String Guitar

#48  Postby John Platko » Oct 15, 2015 1:23 pm

Cutting out the sound hole

Now it's time to cut out the sound hole. I use the same tool that made the rosette channels.

I start on the top.

Image

But before I go all the way through I switch to the back.

Image

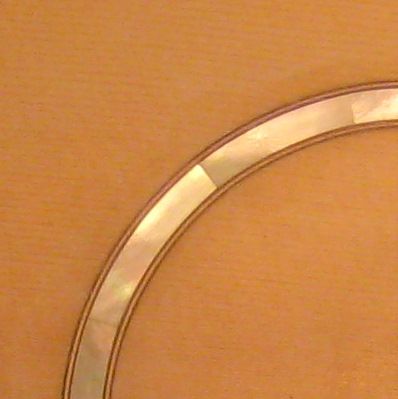
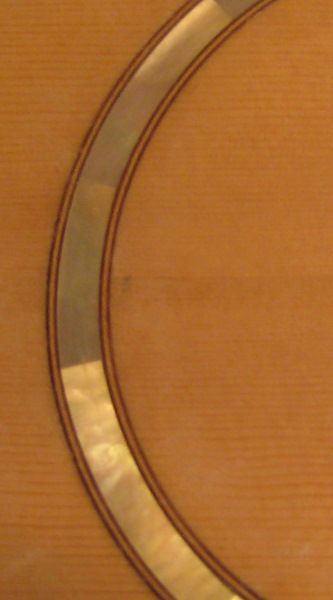
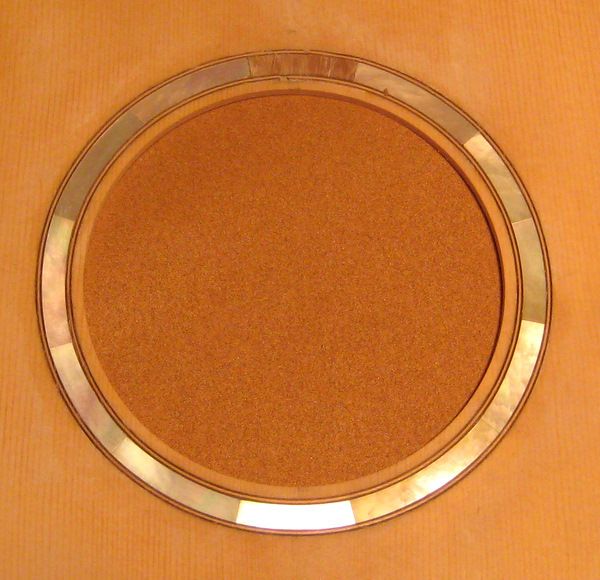
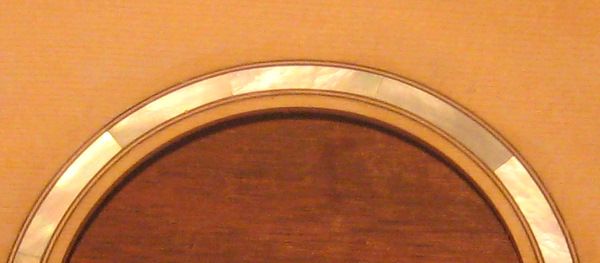
And there you have it.

Image

Image

Here's a similar rosette with abalone instead of mother-of-pearl that I did on another guitar.

Image

Image
I like to imagine ...
User avatar
John Platko
THREAD STARTER
 
Name: John Platko
Posts: 9411
Male

Country: US
United States (us)
Print view this post

Re: Building a Steel String Guitar

#49  Postby Onyx8 » Oct 15, 2015 6:22 pm

:thumbup: Looking good.
The problem with fantasies is you can't really insist that everyone else believes in yours, the other problem with fantasies is that most believers of fantasies eventually get around to doing exactly that.
User avatar
Onyx8
Moderator
 
Posts: 17520
Age: 67
Male

Canada (ca)
Print view this post

Re: Building a Steel String Guitar

#50  Postby The_Metatron » Oct 15, 2015 6:32 pm

Quite fascinating to see this process in one place.
User avatar
The_Metatron
Moderator
 
Name: Jesse
Posts: 22568
Age: 61
Male

Country: United States
United States (us)
Print view this post

Re: Building a Steel String Guitar

#51  Postby John Platko » Oct 16, 2015 12:37 pm

Are flat top guitars really flat? - Guitar geometry

Before going further into construction I'll explain a bit about some important construction details of acoustic guitars so that what happens next makes more sense and has a bit of context.

Most flat top guitars aren't flat! Most of them have some arching on the top and back plates. This arching gives the top some room to move with changes in humidity. This is most important when the guitar is left in dry environments. If the top is built perfectly flat, then if the guitar is left in an environment that is drier that where it was built it tends to pull itself apart as it shrinks from loss of moisture - you get cracks in the top. This is most problematic across with width of the guitar. But if the top was built with an arch then as the top shrinks from loss of moisture the arch can flatten out a bit but doesn't pull itself apart. The arch can also help stiffen the plate in the same way that arching a piece of paper can stiffen it.

On most modern steel string guitars, the arching in the top is created by arching the braces. It's unclear if this was also done back in the day, it may be that the top arching on old Martins was created by bringing the humidity of the boards down during construction and then letting normal expansion of the wood create the arch when the humidity returned. The back braces were arched though so perhaps the top braces were arched also.

As was shown during top baking, this arching is more important across the grain than with the grain because humidity effects wood more across the grain.

I'll get more into the details of top arching when I brace the top, for now I just want to introduce the subject.

I should also mention that even though most modern guitars have arched tops, some builders prefer building with flat tops. Jim Olson (think James Taylor's guitars) and Kevin Ryan build with flat tops. Also, there is a wide range of top arches among builders that use them from about a 20' radius to a 60' radius. I believe modern Martins have a 28' radius.

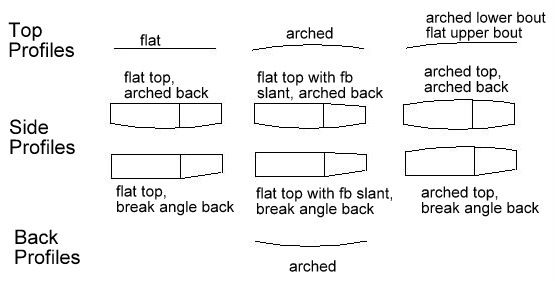
Another important detail is how the sides (ribs, rims) of the guitar are profiled to meet the top. For example, you can build an arched top that joins the sides of the guitar with the sides having a flat profile because the braced top is still flexible and it can be forced to conform to a variety of shapes. Or, you can arch the sides of the guitar to match the arch profile of the top. For example, if you build a top with a spherical radius of 28', then you can put a spherical profile in the sides with a 28' radius so that it matches the top. Many modern builders do this, or something close to this with their own little variation.

Similar considerations apply to the back but some type of back arching of the sides is present in just about all steel string guitars.

If you use spherical construction for the top and back and then profile the sides to match those spheres you end up with a guitar that is wider at the waist then at the tail block. You should convince yourself that this is true. Many modern guitars have this look, you might like it, you might not.

Here's how the profiles can vary.

Image

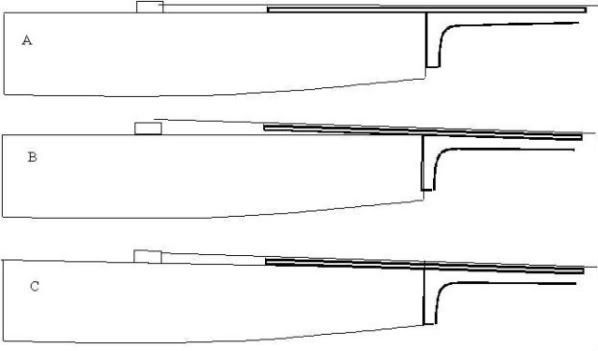
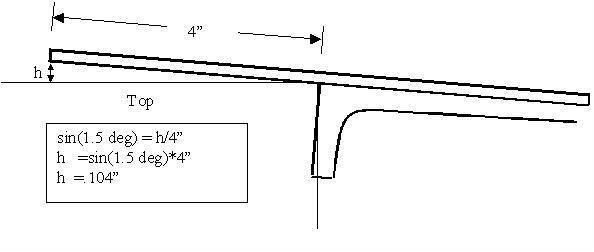
No matter how you go about arching the top and profiling the sides, it's important that the strings end up at the bridge with the proper height over the top (.5” is a good number to shoot for). In order for this to happen it's necessary for the guitar neck to be angled back from the top of the guitar. An angle of 1.5 to about 3 degrees depending on the top arching is common. The fret board sits on the neck so it has the same angle as the neck. The profile of the top and how it sits on the sides must allow for the fretboard angle. The following diagrams help illustrate this point. The first angle is too little, and the strings are too low, the second angle is too much and the strings are too high. The higher the strings are off the soundboard the greater the bridge torque - too much is not good for the long term health of the instrument. The last one is just right.

Image

Image

This geometry is extremely important to the guitars construction and you should take the time to understand it. Drawing a full scale profile of the guitar is the best way to be sure that you understand what is needed for the arching profile that you want.
Over time, because wood has a plasticity quality, tension from the steel strings tends to distort the guitar in a way that effectively decreases the neck angle, after enough time the guitar needs to be repaired, on a guitar like a Martin, the method is to reset the neck, i.e. steam open the neck glue joint, refit the neck to the body, and re-glue. Taylor Guitars use a bolt on neck to make this adjustment easier.

It's also helpful to look at many guitars and study the top and side profiles.

Here's a guitar with a spherically arched top with flat rims on the top-side interface.

Image

Here's a guitar with an spherical arched top with rims spherically shaped to match the arch of the top.

Image

Here's what Bob Taylor has to say about neck angles.

I like to imagine ...
User avatar
John Platko
THREAD STARTER
 
Name: John Platko
Posts: 9411
Male

Country: US
United States (us)
Print view this post

Re: Building a Steel String Guitar

#52  Postby John Platko » Oct 17, 2015 2:59 pm

Making Braces

Braces add a lot of strength to guitar plates without adding much weight. Spruce is the traditional wood used for top braces and it is often used for back braces too. Spruce braces are what I would recommend a new builder use for the top and back. Mahogany is a common substitute brace wood for backs and there are other choices too. I'll be using Douglas Fir on the back

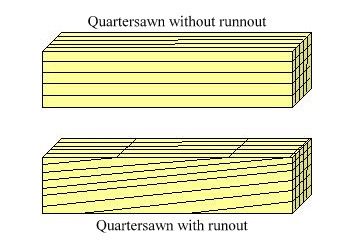
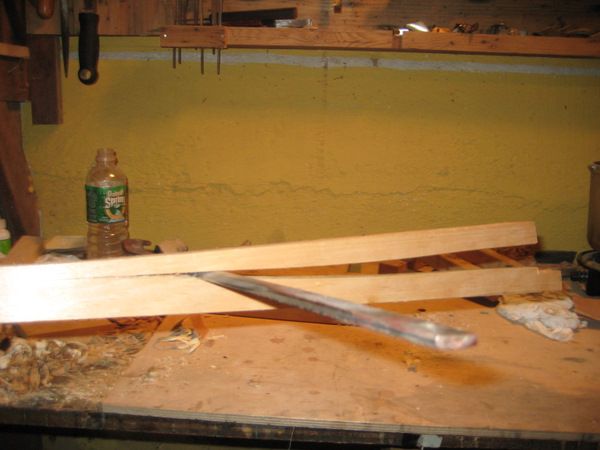
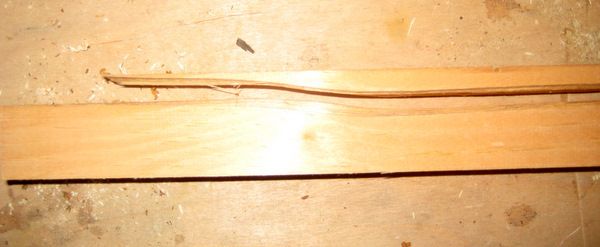
Because braces have such an important structural purpose they should be made from quartersawn wood. In addition to the wood being quartersawn it should not have runout. Runout can occur in wood that looks perfectly quartersawn with long grain on one edge that is perpendicular to the edge on another surface. However, the long grain may run at at angle to the third surface resulting in “runout.”

The following diagram shows the difference between quartersawn wood with and without runout.

Image

It can be difficult to see runout with eye. The best way to identify how the side grain runs is to use split billets. You can buy split billets from a luthier vendor or split your own.

A fro is a handy tool for splitting billets although a wide chisel can also be used.

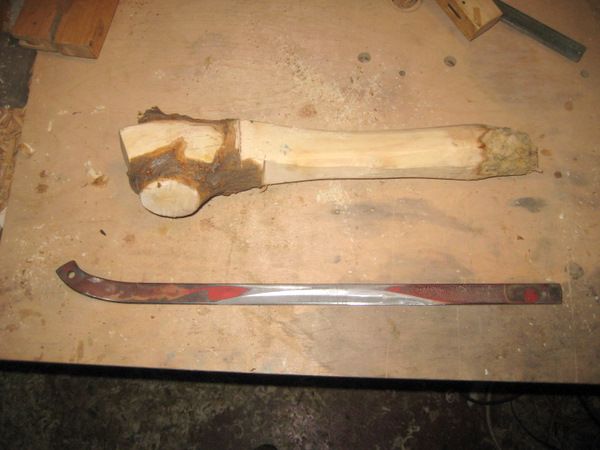
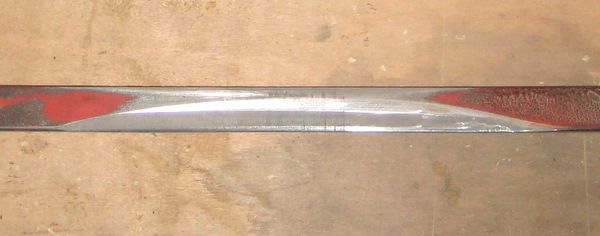
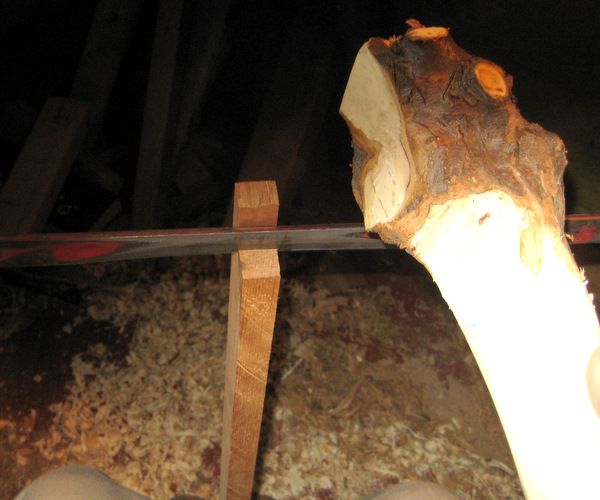
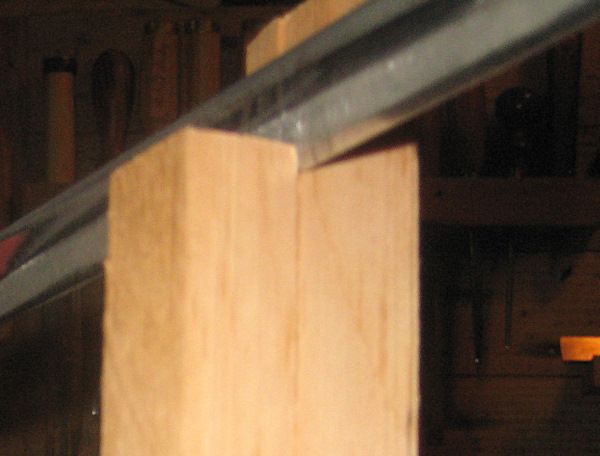
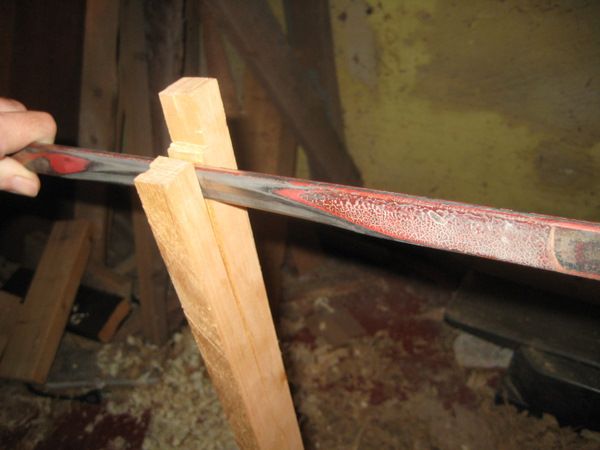
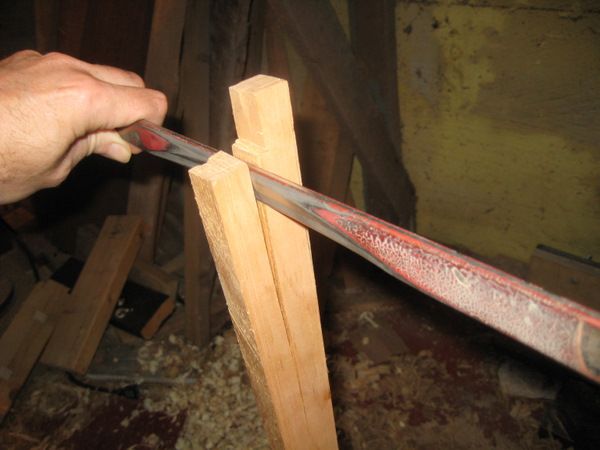
Here's a fro I made from an old Flexible Flier and mallet that I made from a tree branch. It's best if the edge is not too sharp, then the wood will be split and not cut.

Image

Image

Image

The fro and mallet in action splitting wood with various grain directions. I'm splitting a piece of old Douglas Fir that
I'll use for back bracing - an unusual choice but it's nice wood that was used to build my house.

Image

Image

Image

Image

Image

Image

You want to avoid using wood that grew near a knot as shown below.

Image

After splitting the billet along the grain plane the surface smooth.

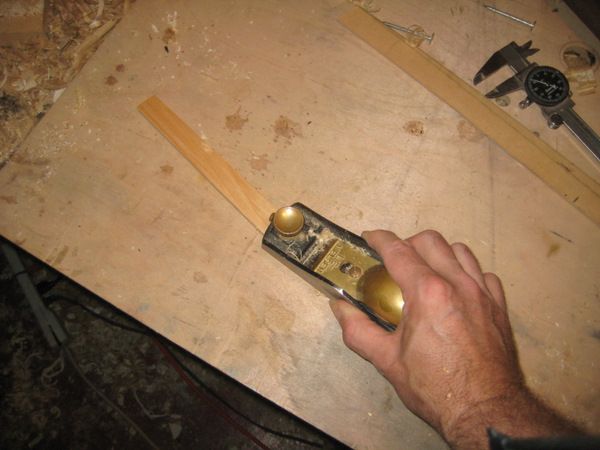
Then cut brace material from the billet. Final brace thickness is 1/4” to5/8” width for a top depending on design. Various widths are used for back braces, consult your guitar plan.

Cut the material a bit wide and plane to final thickness for a smooth surface. A safety planer can be used to thickness rough cut brace material before a final pass with a plane.

Image

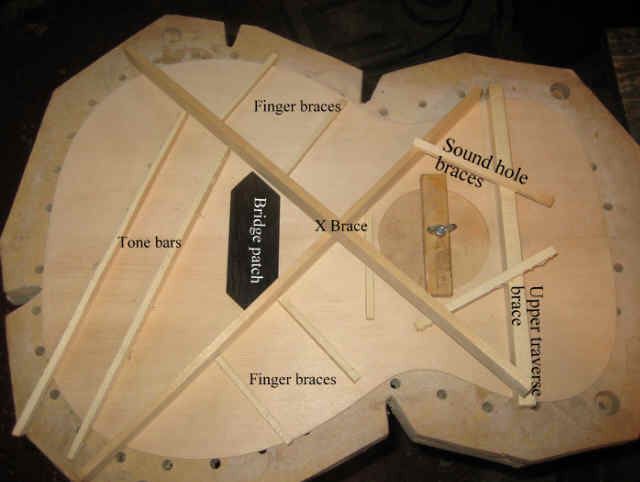
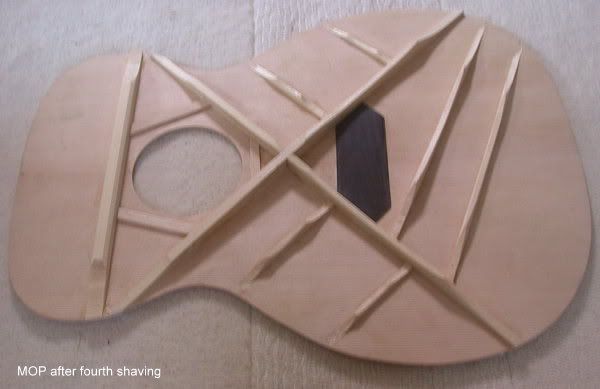
The photo below shows the rough brace material for a steel string guitar with standard bracing. Another brace is sometimes added above the upper traverse brace. This brace often refereed to as the Popsicle brace is designed to help prevent cracks along the edge of the fingerboard, I don't believe it helps much so I omit and use another technique for this purpose.

I start with rough brace heights approximately 3/4” for the X braces. 1/2” for the tone bars. And about 1/4” for finger braces and sound hole reinforcements. The upper traverse brace is 1/2” wide and 3/4” tall at this point.

Image

Eventually the braces will be shaped and re-sized but that happens after they are glued onto the top of the guitar. Below is a photo of a completed braced top. I'll cover the bracing of it in detail in future episodes.

Image

The x braced guitar top is a Martin invention but here's a Taylor Guitar video talking about how they use it.

I like to imagine ...
User avatar
John Platko
THREAD STARTER
 
Name: John Platko
Posts: 9411
Male

Country: US
United States (us)
Print view this post

Re: Building a Steel String Guitar

#53  Postby laklak » Oct 17, 2015 4:11 pm

I am thoroughly enjoying this thread, it's the first thing I check when I log in.
A man who carries a cat by the tail learns something he can learn in no other way. - Mark Twain
The sky is falling! The sky is falling! - Chicken Little
I never go without my dinner. No one ever does, except vegetarians and people like that - Oscar Wilde
User avatar
laklak
RS Donator
 
Name: Florida Man
Posts: 20878
Age: 70
Male

Country: The Great Satan
Swaziland (sz)
Print view this post

Re: Building a Steel String Guitar

#54  Postby Alan B » Oct 17, 2015 7:22 pm

I must admit that it is immensely gratifying seeing a craftsman at work and following the steps through each stage of construction.

I must also admit to a feeling of envy creeping in.

If only...

Well done, John.
I have NO BELIEF in the existence of a God or gods. I do not have to offer evidence nor do I have to determine absence of evidence because I do not ASSERT that a God does or does not or gods do or do not exist.
User avatar
Alan B
 
Posts: 9999
Age: 87
Male

Country: UK (Birmingham)
United Kingdom (uk)
Print view this post

Re: Building a Steel String Guitar

#55  Postby John Platko » Oct 18, 2015 2:13 pm

I'm glad you're enjoying the thread. We're just starting to get to the best part - bracing the soundboard.

Arching braces

Because flat tops are not usually flat, it helps to have some tools that can measure arches. Here are my tools.

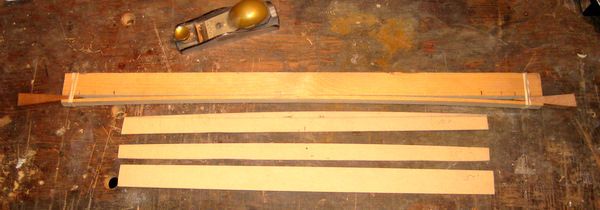
Image

On top is a tool that I can set to different radius arches. It's just a board with a slit cut in it. Two wedges that are held in place with rubber bands control the radius of the arch. A few holes where the slits end might be a nice touch to prevent splitting.

Below the radius measuring tool are a few radius templates that I use. I use these templates to calibrate the radius measuring tool and also for arching braces.

Now these are pretty big radius, 15' to 50', my compass isn't that big. I make them by just putting a couple of nails in my bench to hold a thin flexible piece of wood and then add a third nail centered between the other two and offset enough to provide the radius that I want. After the board is flexed into position I trace the outline.

Here's a chord calculator that will do the math for you.
http://www.1728.com/circsect.htm

Now the method I described doesn't make a perfect circle, which is fine with me, I don't really want a perfect circle anyway but if you do you can use a long compass.

http://jsevy.com/luthierie/compass/Long_compass.html


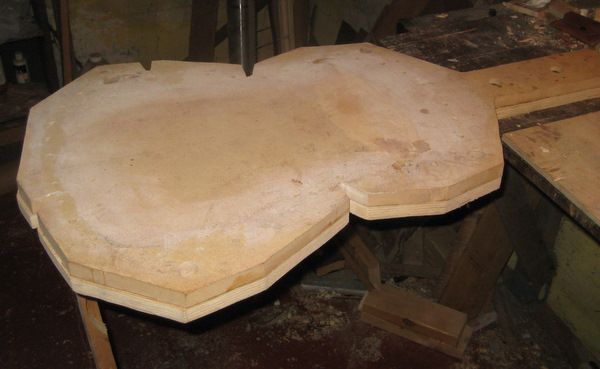
A fixture that helps me attain the top arching that I want is a solera. A solera is a traditional construction aid used by Spanish makers building classical guitars. A solera is a work board which has the desired arch of the top built into it. For traditional classical guitars only the lower bout (lower half) of the guitar top is arched, the upper bout remains flat. Traditional classical guitars have the neck permanently attached to the body using a Spanish heel. Because of this it's very important to set the neck angle of classical guitars correctly during the build - it's the only chance you get to do it right. Nylon strings don't have as great a tension as steel string guitars so classical guitars are built much lighter. The top bracing provides much less structural support and the neck doesn't use an adjustable truss rod. Also, the geometry is a little different and it's common for classical guitar to have a negative neck angle or a 0 degree angle as opposed to the positive neck angle that I showed earlier for steel string guitars. Interestingly enough, the X braced Martin pattern was originally designed for nylon strings - it was only much latter, when the added power that steel strings gave came into fashion that the pattern really shined. Today's classical guitars evolved from the Anthony Torres tradition while steel string guitars evolved from the Martin tradition.


Martin guitars traditionally have a more removable neck joint - even their early gut/nylon guitars had this feature,- It turns out to be a very good feature for steel string guitars.


Below is my solera bolted to the edge of the workbench. Besides its function as providing a mold for the shape of the top it acts as an extension of the workbench which gives access to the top from all sides.

Image

The final arching that I want the top to have is reversed carved into the solera. You can see that I adjusted it a bit over time and filled in the upper bout a bit reducing the arch there some.

It's a bit difficult to see in the picture but here's the solera arching at the bridge. That's were the greatest arch is.

Image

The solera not only aids in setting the arching of the top but also helps establish the correct geometry for the fingerboard to mate with the body at the correct neck angle.

Image


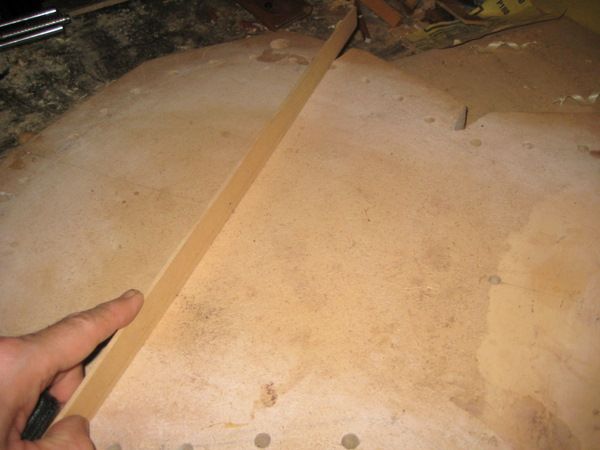
After the braces are roughed out to the correct rectangular dimensions it's time to put an arch on the bottom of them. I use a 25' radius on all top braces except for the big brace above the sound hole (the transverse brace, also called the No 1 brace) I use a 50' radius for that.

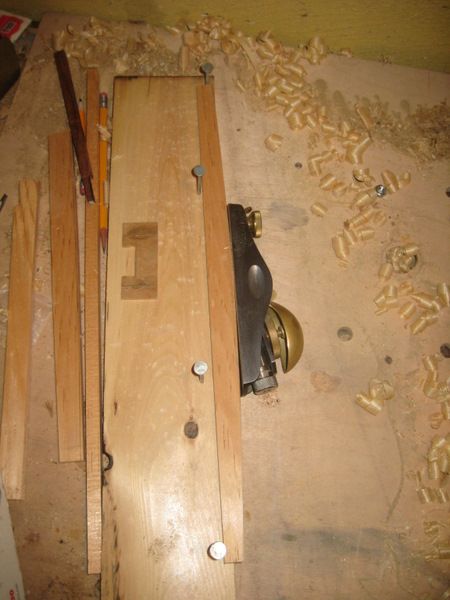
The arches are made by using the arch template to draw a line following the arch on the brace stock.. Then a block plane is used to plane to the line. A simple shooting board will keep the plane perpendicular to the brace and that's why I like this method of arching the braces. There are others.

Drawing the arch on a back brace.

Image

Image

Planing to the arch line on a back brace. A simple board with a few nails that are easy to reposition makes a good shooting board for arching braces. Using this method keeps the arch perpendicular to the side of the brace.

Image
I like to imagine ...
User avatar
John Platko
THREAD STARTER
 
Name: John Platko
Posts: 9411
Male

Country: US
United States (us)
Print view this post

Re: Building a Steel String Guitar

#56  Postby The_Metatron » Oct 18, 2015 5:09 pm

laklak wrote:I am thoroughly enjoying this thread, it's the first thing I check when I log in.

You're goddamned right.
User avatar
The_Metatron
Moderator
 
Name: Jesse
Posts: 22568
Age: 61
Male

Country: United States
United States (us)
Print view this post

Re: Building a Steel String Guitar

#57  Postby Shrunk » Oct 19, 2015 10:15 am

The_Metatron wrote:
laklak wrote:I am thoroughly enjoying this thread, it's the first thing I check when I log in.

You're goddamned right.


:thumbup:
"A community is infinitely more brutalised by the habitual employment of punishment than it is by the occasional occurrence of crime." -Oscar Wilde
User avatar
Shrunk
 
Posts: 26170
Age: 59
Male

Country: Canada
Canada (ca)
Print view this post

Re: Building a Steel String Guitar

#58  Postby hackenslash » Oct 19, 2015 10:17 am

Shrunk wrote:
The_Metatron wrote:
laklak wrote:I am thoroughly enjoying this thread, it's the first thing I check when I log in.

You're goddamned right.


:thumbup:

:thumbup: :thumbup: :thumbup:
hackenslash
 
Name: The Other Sweary One
Posts: 22910
Age: 54
Male

Country: Republic of Mancunia
Print view this post

Re: Building a Steel String Guitar

#59  Postby John Platko » Oct 19, 2015 1:12 pm

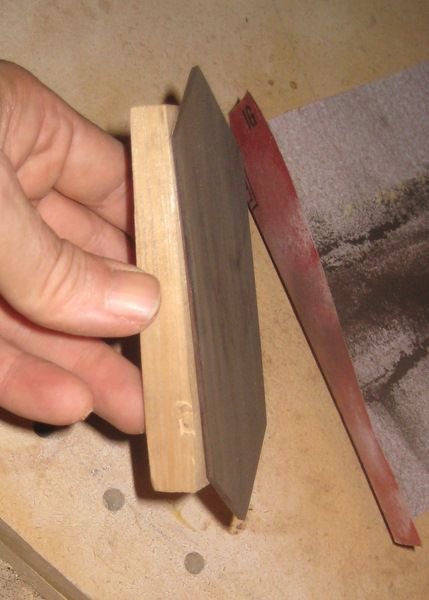
Making the bridge plate

The bridge plate lives under the bridge and keeps the balls of the strings from chewing up the soft spruce top wood. It's definitely a place where you want a hardwood. (Classical guitars don't need a bridge plate because the strings tie to the bridge, sometimes luthiers add a softwood bridge path.)

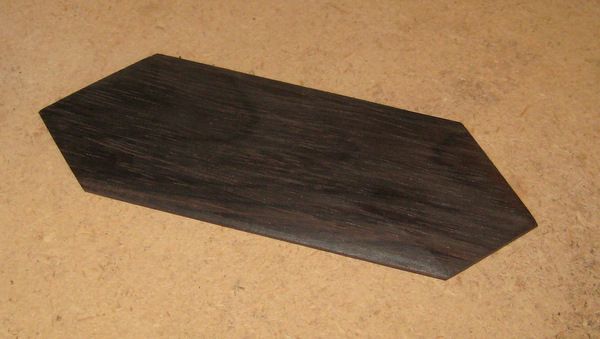
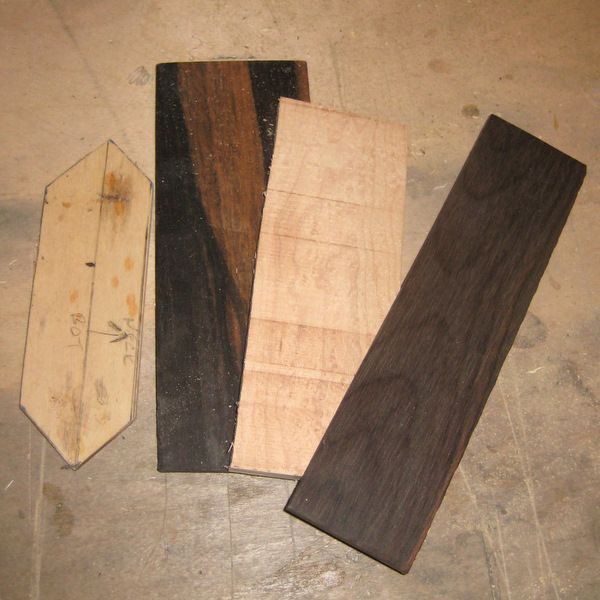
Below is a photo of my bridge patch template and some ebony, maple, and Brazilian Rosewood bridge plate stock. Osage Orange is another great bridge plate material although it can be a bit chippy to work. If I was going for a darker, warmer guitar I would use Indian Rosewood.

Image

Maple is the traditional wood for bridge plates on old school Martins. Sometime in the 60s they switched to Indian rosewood. There is lots of folk lore about which is better. In general I think of maple as being a brighter sounding wood so if I was building a dread I would use maple. I would also use maple if I was building an old school Martin 000 or 00. In this case, I'm not, so I'm usingBrazilian rosewood for a touch of sweetness with plenty of brightness. (How much does this matter :dunno:)

This is one of the few places where quartersawn wood isn't necessarily the best choice. The string balls are more likely to crack the plate along the grain with quartersawn wood. There are some other ways to angle the grain which works well also but a piece of flat sawn wood like the one shown below works.

Image

I use the template to guide the cuts for the bridge plate outline. It is the right size with the right angles for the X brace to mate with it for this size guitar.

Image

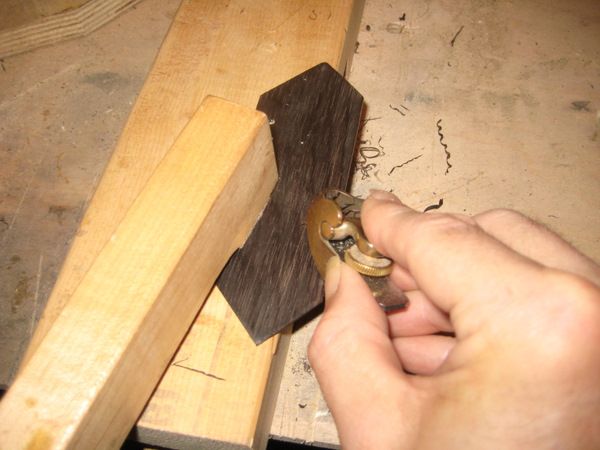
Then I sand a convex surface onto the top of the plate so that it will conform to the arch of the top. I use a piece of sandpaper inside the solera. A bit of double side sticky tape allows me to attach a temporary handle on the bridge patch.

Image

Image

Finally I fan the front and back edges of the bridge plate down, this reduces the possibility of the glue lifting the edge of the plate. I'm using a violin plane for that.

Image

That's good for now, I'll work the edges of the bridge plate some more after it is glued onto the soundboard but
for now I'll keep them thick enough so I get a good glue joint.

Image
I like to imagine ...
User avatar
John Platko
THREAD STARTER
 
Name: John Platko
Posts: 9411
Male

Country: US
United States (us)
Print view this post

Re: Building a Steel String Guitar

#60  Postby John Platko » Oct 19, 2015 3:46 pm

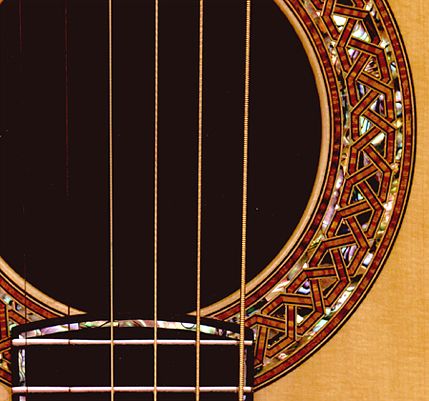
I've been trying to point out some of the differences between steel string and classical/flamenco guitars as I go, here's some youtube supplemental videos showing how to make and inlay a rosettes of the style more typical of a classical guitar.


and some other classical rosettes (not mine)

Image

Image

Image

Here's a couple that my teacher made.

Image

Image

Image
I like to imagine ...
User avatar
John Platko
THREAD STARTER
 
Name: John Platko
Posts: 9411
Male

Country: US
United States (us)
Print view this post

PreviousNext

Return to Technical Design and Engineering.

Who is online

Users viewing this topic: No registered users and 1 guest

cron